Wednesday, July 31, 2013

Even More Matte Topcoat Comparisons

Welcome to what is apparently a series about matte topcoats that I never really planned to do, as this is the third post on the topic in as many months. First there was OPI Matte Topcoat and Comparisons and then there was More Matte Topcoat Comparisons, and here I am today with five mattifiers that weren't in either of those two posts (plus a couple that were so it's more clear how these new ones measure up).

The first lineup consists of OPI Matte Top Coat (a bottle I bought, as the review bottle made its way to Lucy), Essie Matte About You, GOSH Mat Effect Top Coat, and Cult Nails Wax That.


Here they are over black, in the same order as the bottles above (OPI on the left):


The OPI and Essie are truly matte and fairly indistinguishable from each other; if pressed, I'd say the OPI has a tiny edge because it seems to go on a touch more smoothly, but that could be my imagination. The GOSH is pretty darn matte, too. The Cult Nails is designed to give a waxy look, so it being more satin was no surprise.

Here's a side view so you can see a different angle on these:


Next up: Essie (again, as a control), Icing It's a Matte Matte World, Ulta Matte Topcoat (which I've only ever seen in the Nail FX set), and Fing'rs Heart 2 Art My Boyfriend Matte.


On the nail, the Essie shows how the other three aren't really terrbily matte. Though I suppose I can see why Icing and Fing'rs went with matte in their names, as "It's a Satin Satin World" and "My Boyfriend Satin" make even less sense than most goofy nail polish monikers.


As of right now, I do not have any unswatched matte topcoats in my stash (at least not that I came across when I did my big stash sorting several weeks back, but that was focused on colored polishes, not toppers and bases and treatments, so it's possible I overlooked one). I do know that there are a matte topcoats out there I haven't bought, like Orly. Probably I will buy them if I see them, I just haven't seen them yet.

Tuesday, July 30, 2013

Milani Purple Martin and Carnival

When I encountered the Milani Fantasical Plumage display for the first time, I was in an uncharacteristically sensible mood and only bought two polishes of the six on offer. If you've read this blog for a while, you can probably look at the display and guess which ones without needing to read the title of this post.


I had to have the glitter, of course, and faced with a choice of cremes, purple is my default.

Purple Martin is a medium purple creme. It definitely challenged my camera's ability to render purples correctly, thus the even rosier than usual glow to my ginder in the photo below. I used two coats, no topcoat, for this swatch.


Carnival has black and white glitter in a clear base. I thought this was part of the Jewel FX line, based on the display text as well as the black cap and black lettering on the bottle, but it doesn't seem to say "Jewel FX" on the front of the bottle like others in that line do. Though since it's black lettering on a mostly black polish, it could be that it does say it and I just can't see it against the background. The glitter mix in Carnival is made up of really big white hexes, somewhat big black hexes, and long skinny black bars. I found it ungainly to work with, requiring a lot of fishing to get a decent amount of glitter out and a lot of work to get the bars to scatter in any sort of remotely pleasing arrangement. This doesn't go on in coats so much as dabs and shoves. I added a layer of topcoat, but it still looks sort of lumpy, probably because I did have do do so much manipulation of the glitter on my nail.


While I appreciate Milani trying something different with Carnival, it doesn't work for me. It's too much work to apply and those bars are just too long and ungainly for my taste. Maybe I could layer something else over it to make it more pleasing to me—perhaps that's what the glitter in the other new Milani display is for.


Monday, July 29, 2013

Recent NOTD: Maybelline Fashion Prints Nail Stickers

In my continuing quest to try more brands of nail strips/stickers, I wore a set from the recent Stick-On Mirrors display of Maybelline Fashion Prints Nail Stickers. That looked like this:


The design I chose, Silver Sparks, is the odd one out in that display, as it's the only one that doesn't have a reflective foil look to to it (it's also the only one that has some color to it, which is why I was drawn to it, I think). I wonder if the original plans had a different design in this slot, something more suited to the name, as these don't have hardly any silver in them at all.


When I posted the display photo originally, I remarked that Silver Sparks reminded me of the Essie textured strips. Opening the package only reinforced that idea, as the contents were the same as Essie: a set of 18 strips on a clear backing sheet, a small file, and a clear plastic cuticle stick. Like the Essie, the strips felt and smelled rubbery.


The thing I did not realize about Silver Sparks was that the strips are not opaque; maybe you can see what I mean in the in progress shot below. Application of these was same as the Essies, with the thicker strips making them easier to pick up off the sheet and set down on the nail but harder to manipulate when on the nail and removing the excess.


The design has so much going on that I didn't really notice the sheer base of them once they were on. The background is made up of a slightly warped grid of oval shapes that have a pastel oil slick look to them; they shift from golden green to teal and show glimpses of rainbows, too. Scattered over that, there's fine blue and green glitter that seems to do some shifting and color sparking, too. I found these quite fascinating to look at.


They also happened to coordinate quite well with a flowery summer top I have in my wardrobe.


What they didn't do was wear very well. Here's what my tips look like after only a day and a half:


Pity they didn't hold up better, as they looked great in the sunshine.


There were two type of wear going on, and I hope this next shot from day 3 shows that better. The design elements came off the clear base, and then the clear base itself started to wear down, which made it look like my nails themselves were peeling when for a change they were not.


By day 5, it looked like I had some weird reverse French tip thing going on, where my tips were bare and the rest of the nail was covered. Extreme Tipwear: Nail Sticker Edition, let's call it.


I'd intended to wear these a full week to give them a proper wear test, but at this point I couldn't stand to go around with my tips showing like that, so I added a funky French with Nina Ultra Pro Twinkle Twinkle, a slate blue glitter. I was so delighted by the effect that I barely noticed the places where the strip design had worn off in places farther up my nails.


This look coordinated quite nicely with another shirt, too—it's rare when my nails match my outfit, and here this mani managed that twice in one week.


When it came time to take this off, I had to use remover for the glitter, but the strips were pretty unimpressed by that so I peeled them off. My nails looked fine underneath.

The package for these says "up to 10 day wear". If you don't use your hands at all, maybe. Or perhaps the foil-looking ones last longer and they did the tests on those; I did grab a set to try but haven't yet gotten around to it (story of my life, I tell you).

*****

I know some of you don't read blogs on weekends, so I wanted to make sure you knew I posted a giveaway on Saturday for three colors of Sally Hansen Sugar Coat.

Saturday, July 27, 2013

Sponsored Giveaway: Sally Hansen Sugar Coat

Last month I swatched the first group of Sally Hansen Sugar Coat polishes, and today I'm back with a few of them to giveaway, thanks to the brand itself, whose rep sent me three colors to award to a lucky reader.

In case you haven't seen these yet, here are the Skittles swatches I did of the whole collection—

Left to right below: Sugar Fix, Sweetie, Sour Apple, and Cotton Candies.


Below: Bubble Plum, Cherry Drop, Razzleberry, Lick-O-Rich.


And here are the bottles I've giving away thanks to Sally Hansen—Cherry Drop, Sweetie, and Bubble Plum:


These particular bottles are extra fun because two of them have special sample labels on them; if you win, your Cherry Drop and Bubble Plum won't be like everyone else's.


To keep this simple, entering will be as easy as leaving a comment below letting me know you want your name in the draw. If your profile link doesn't lead to some way to contact you, please leave your e-mail address in your comment, too. International entries are welcome. Contest closes August 8, 2013.

The bottles of polish shown in this entry were provided free for giveaway purposes. The content of the entry was not dictated by the provider. The polishes shown in swatches were purchased by me.

Update 09-Aug-2013: Contest has now closed. I will be announcing the winner soon.

Update 15-Aug-2012: Winner chosen via random.org and has replied to me. Announced in this post.

Thursday, July 25, 2013

Recent NOTD x3: Essie Sleek Sticks

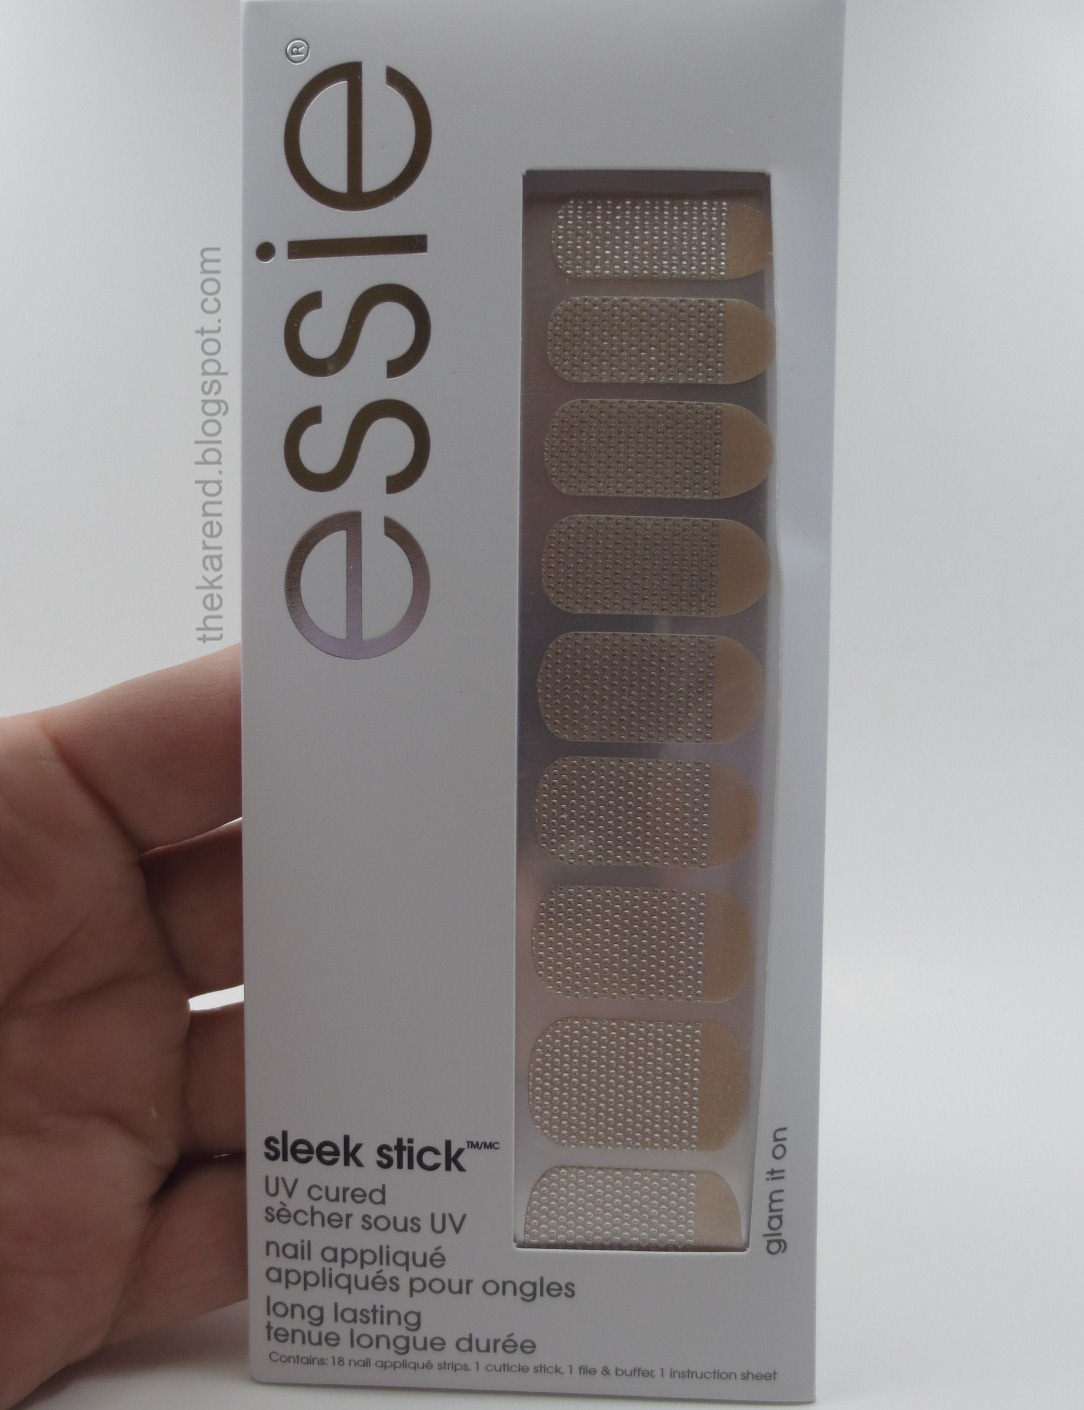
I've posted display photos of Essie's entry into the nail strip category, Sleek Sticks, but it took me a long time actually buy any because unlike other brands, they don't seem to go on sale. Then one day I was wandering through Kohl's and saw them there; I guess I sort of knew Kohl's had Essie but there's so much else to attract my attention there (costume jewelry on clearance especially) that it didn't really register that I could use my Kohl's coupons to get the Sleek Sticks. They didn't have the largest selection there, or any of the newest designs, but since I hadn't tried any that didn't matter to me.

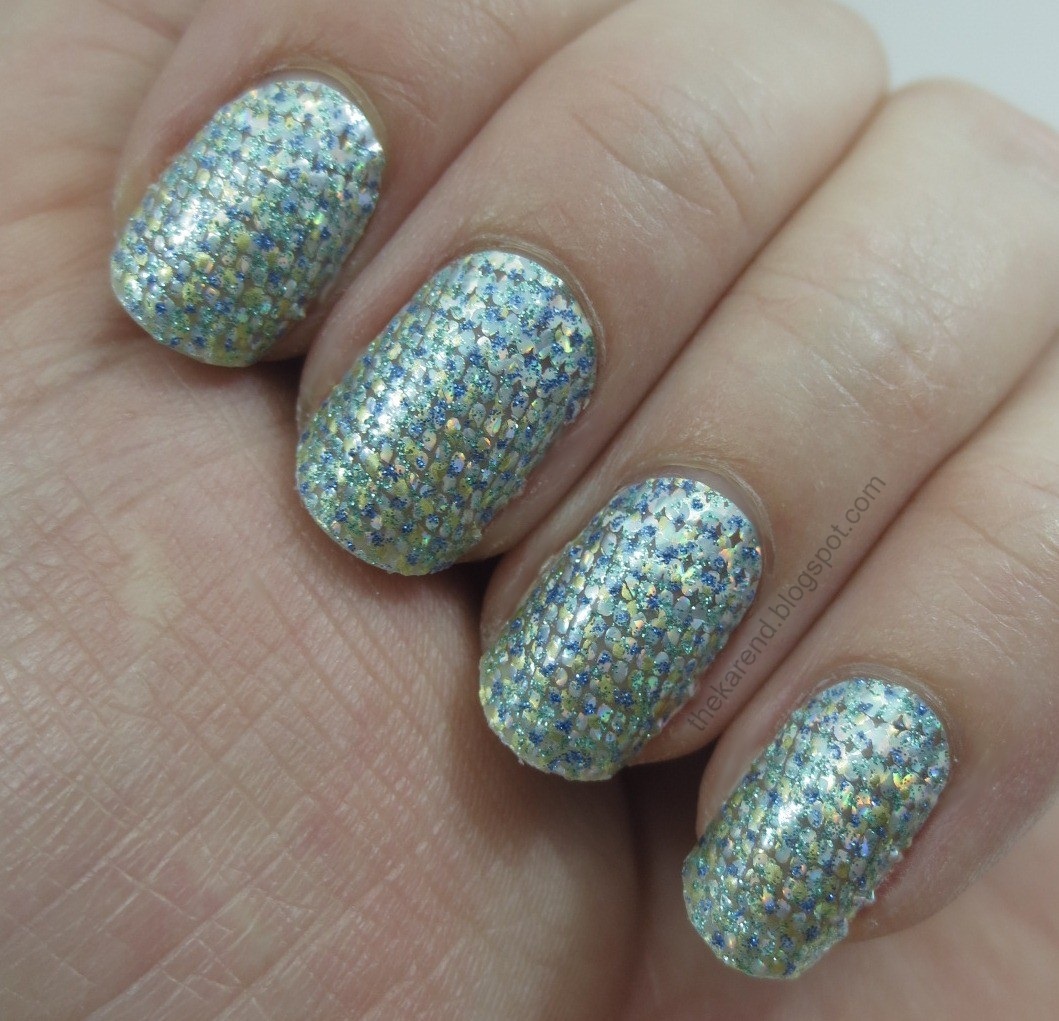
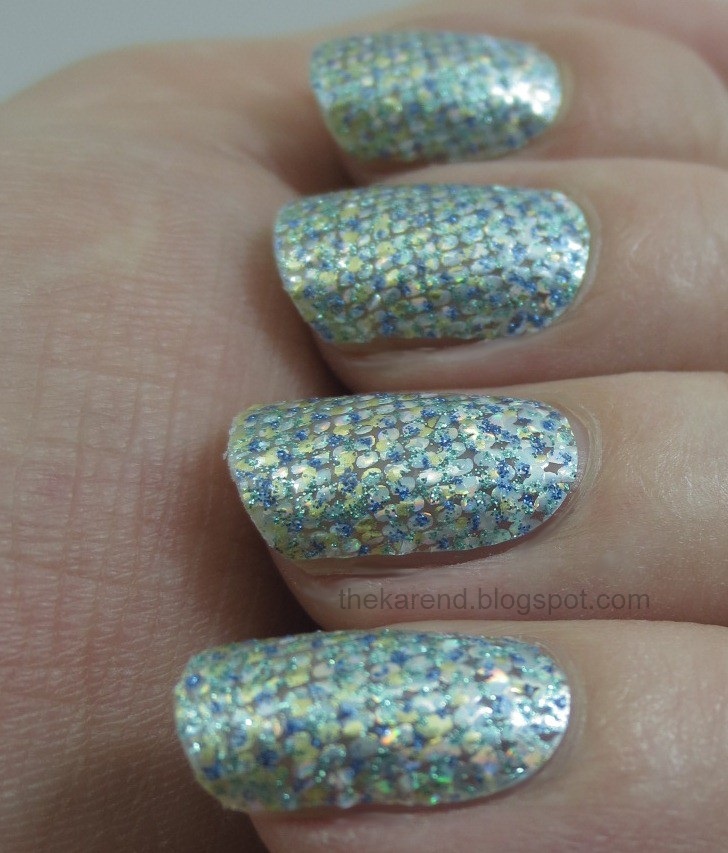
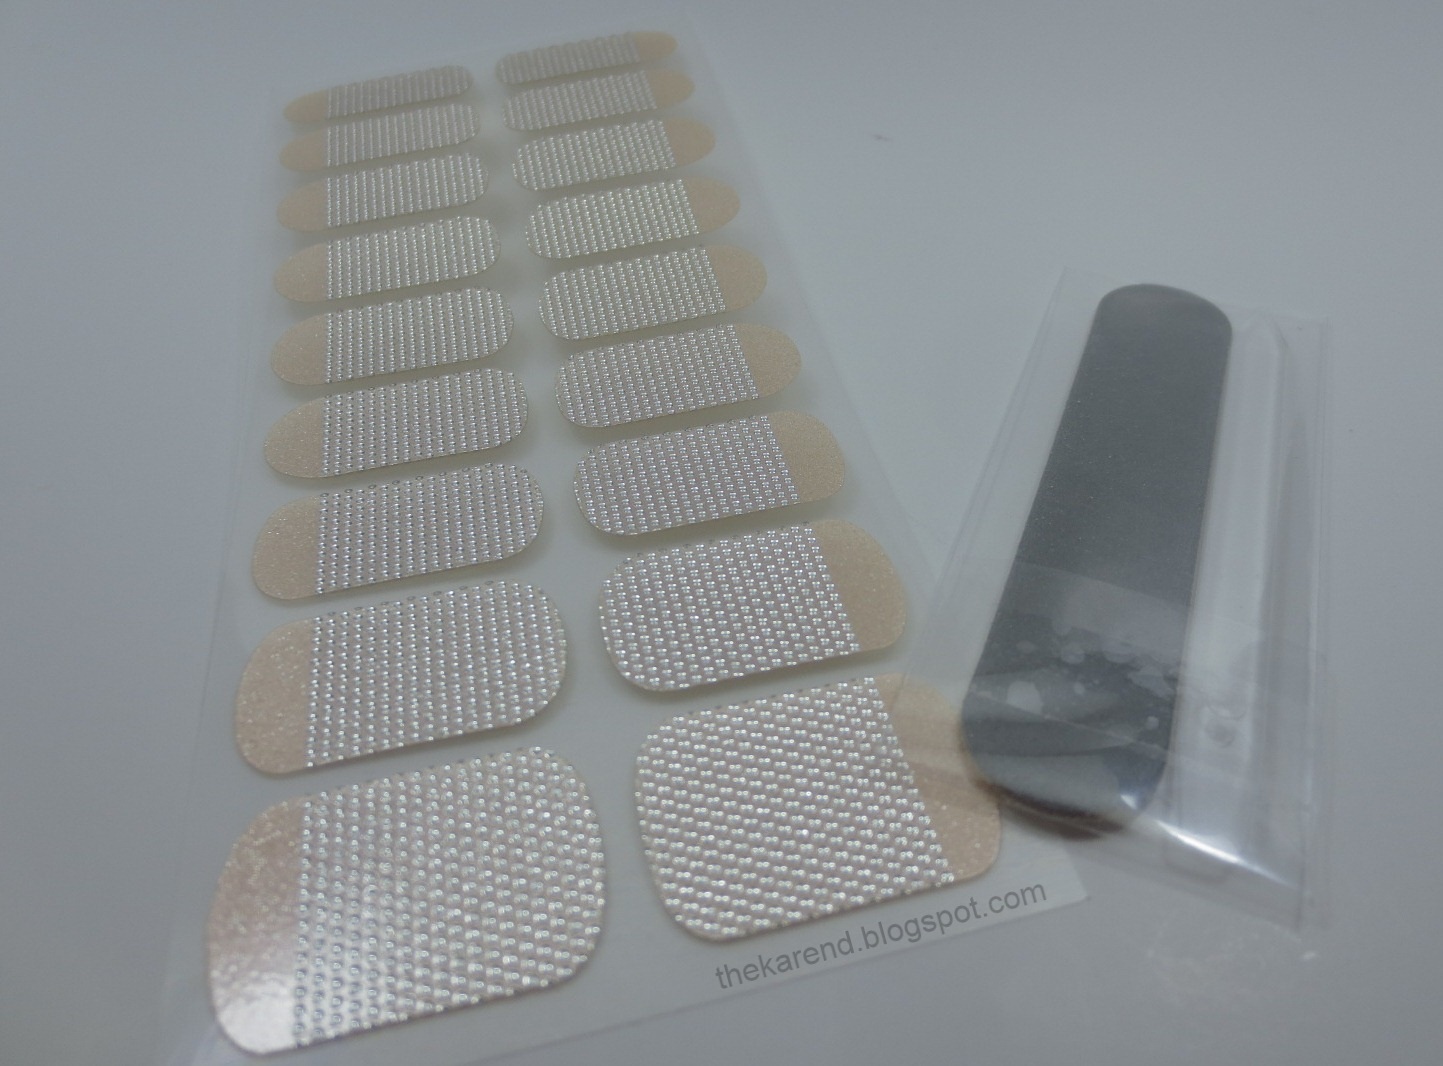
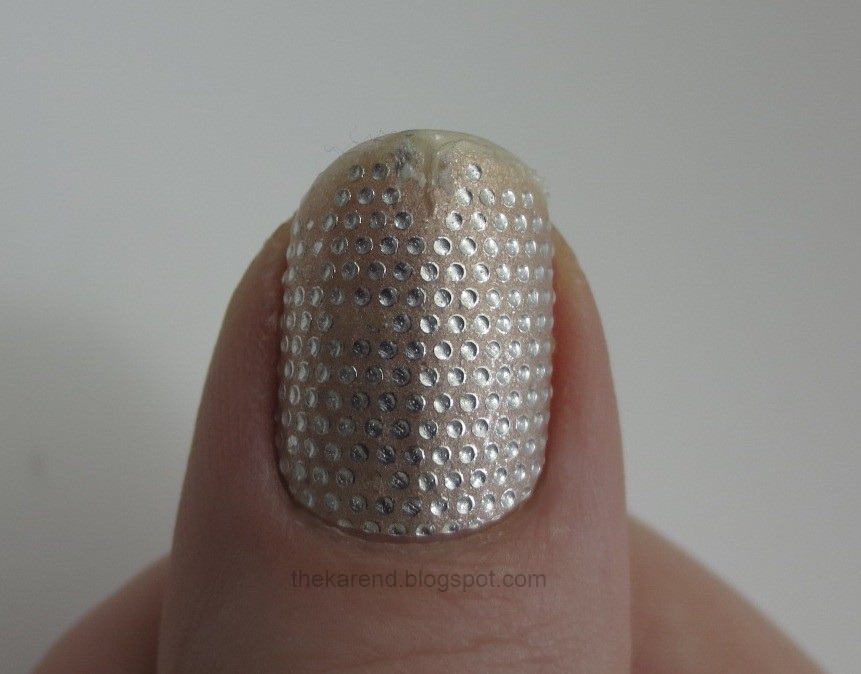
I chose Glam It On for my maiden voyage with these strips. This design has raised silver dots on a peach background.


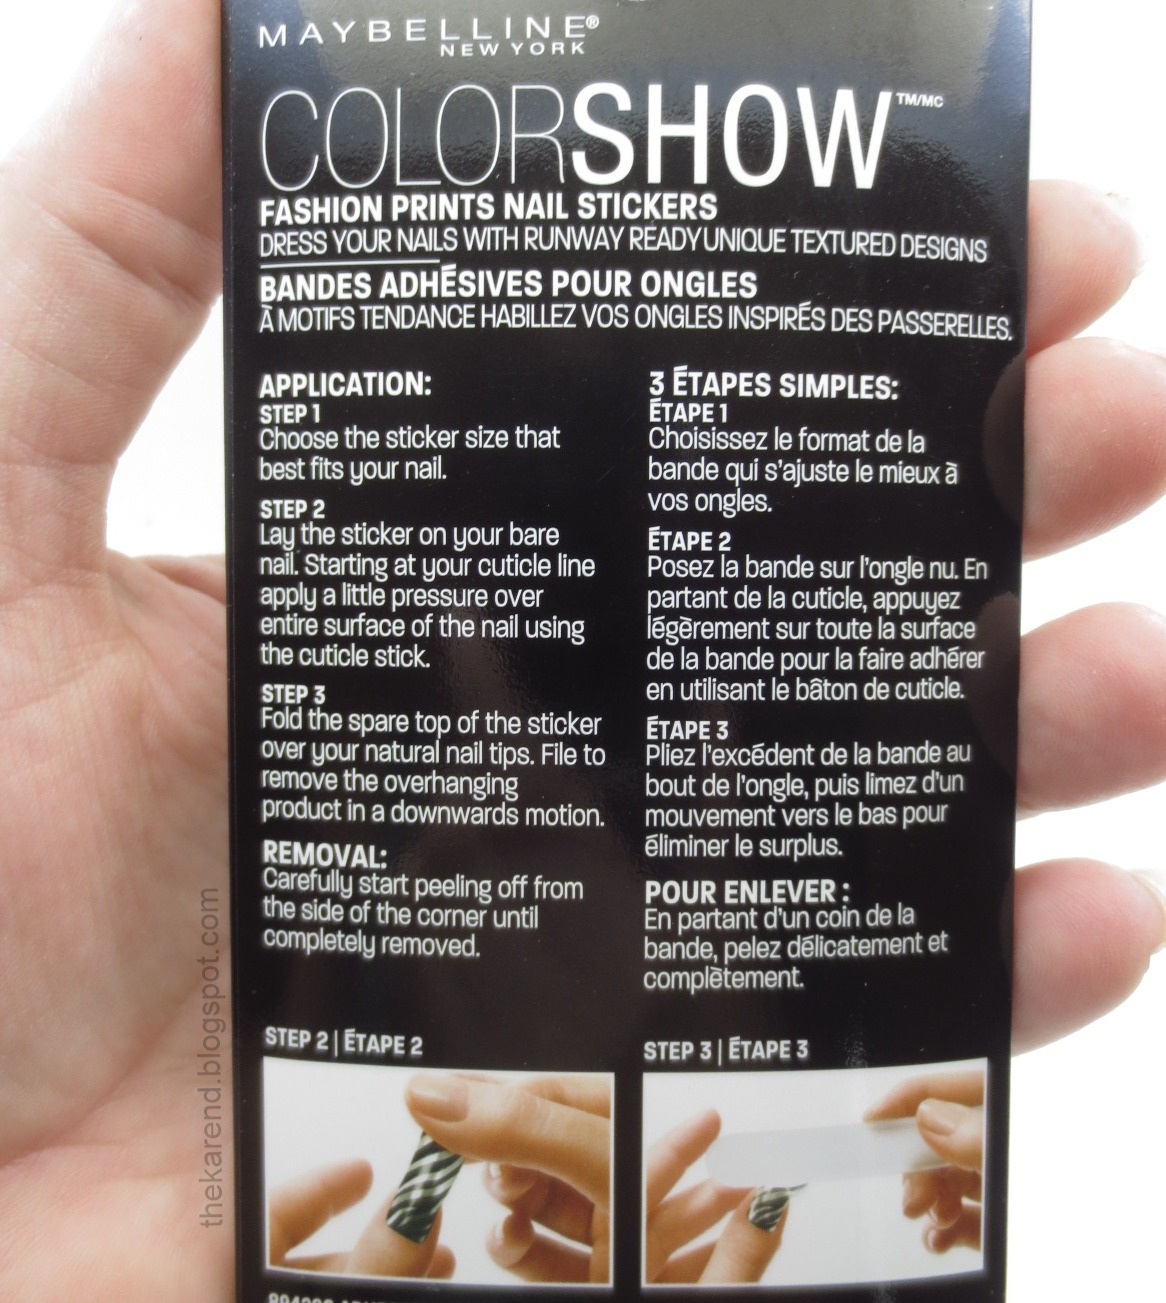
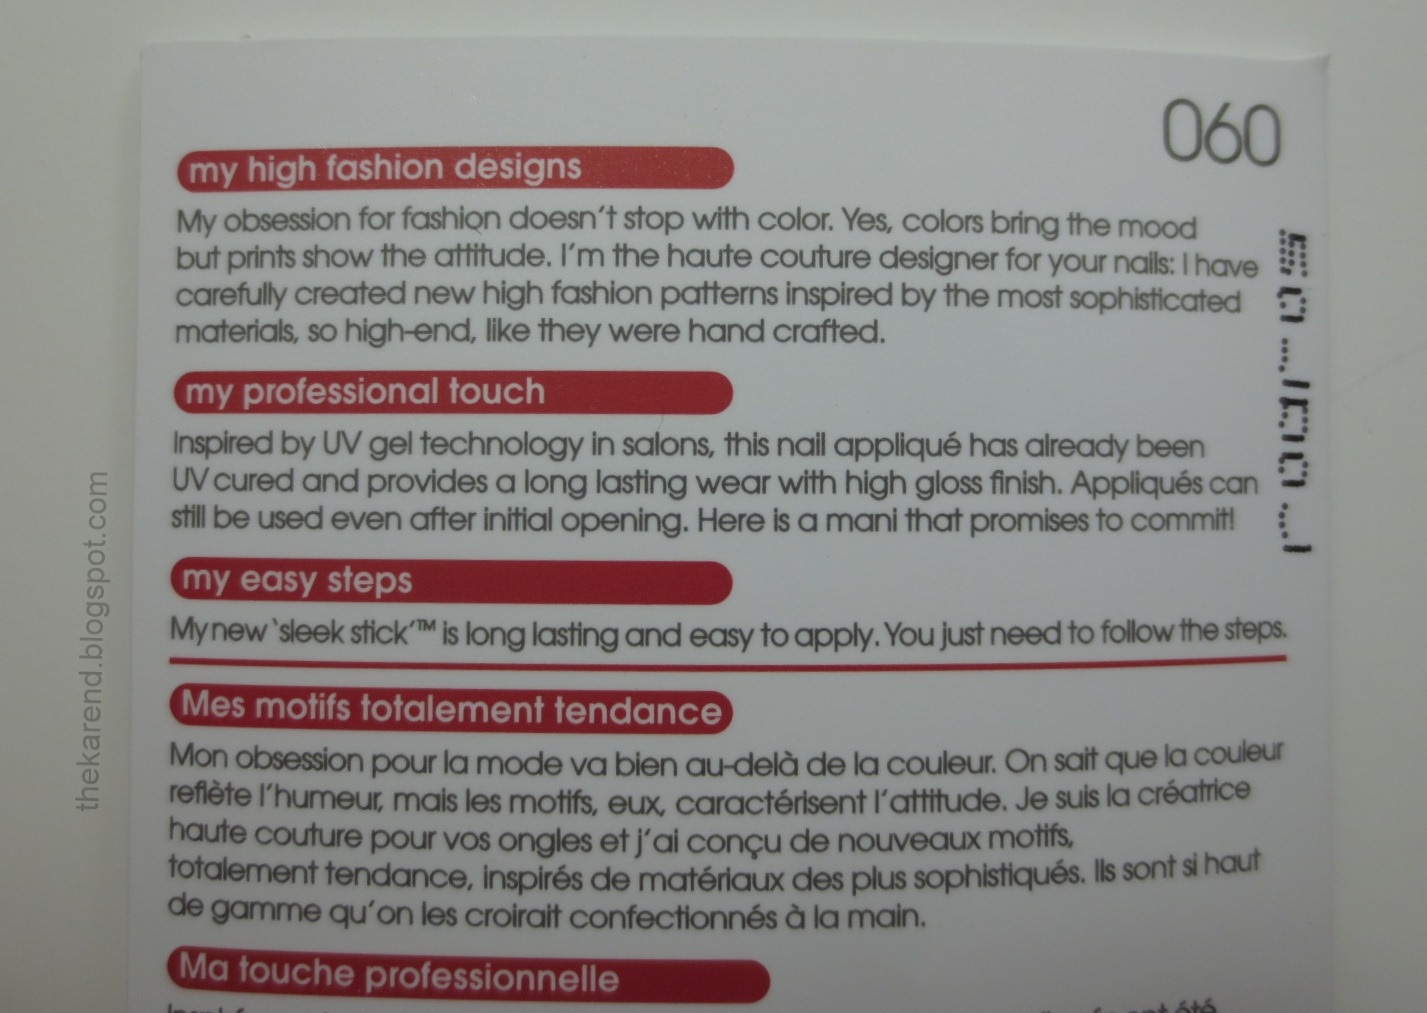
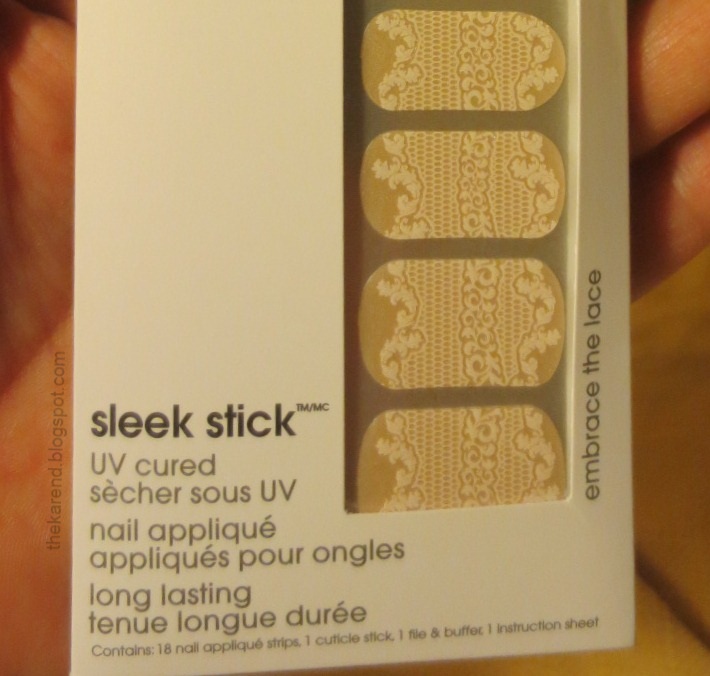
The outside of the package touts that these nail appliqués are "UV cured" and that this "provides a long lasting wear with a high gloss finish".


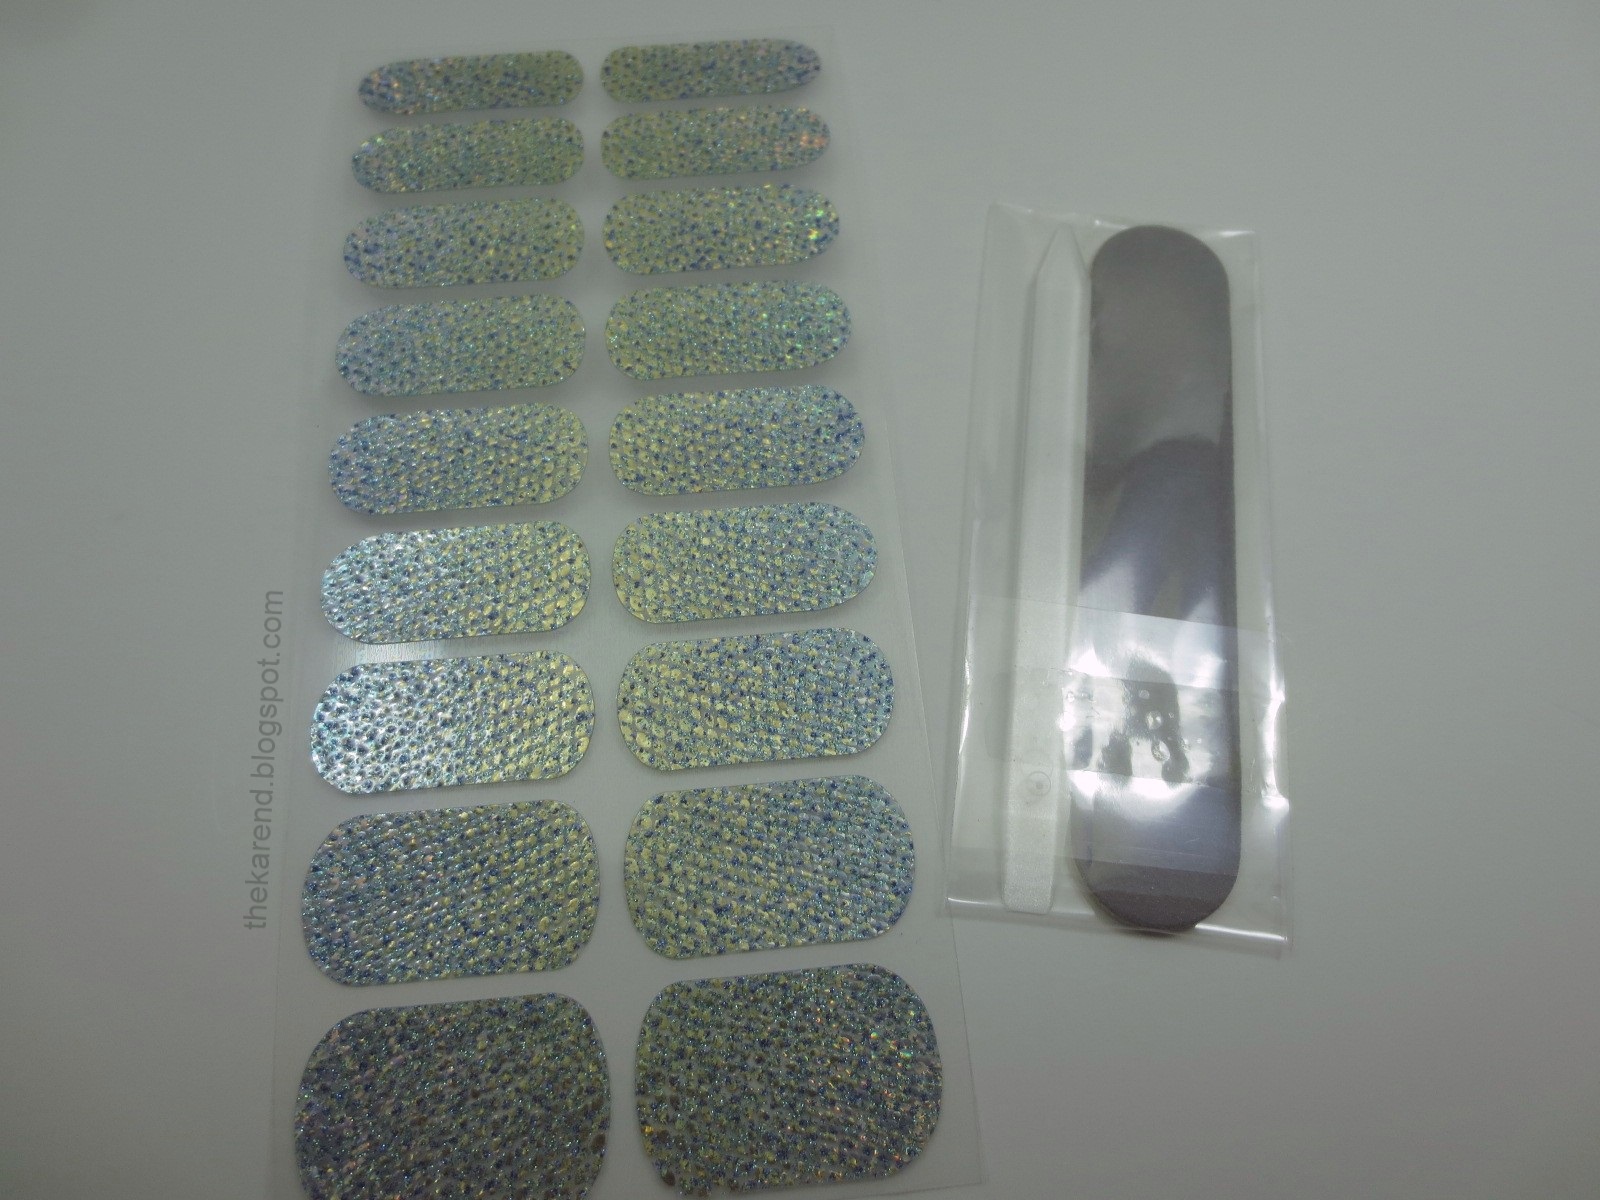
The package contains a sheet with 18 stickers, a small file, and a clear plastic cuticle stick. There is also an instruction sheet (not pictured).


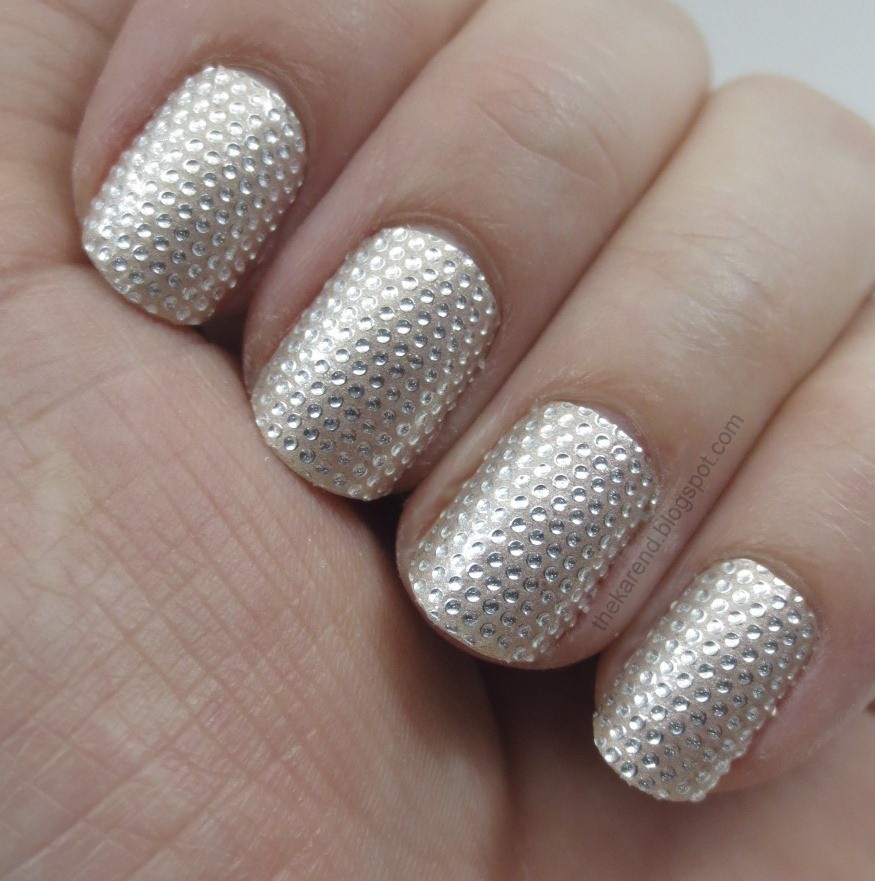
Application of these was similar to other nail strips, though these are the thickest and most textured I've used. They felt (and smelled) a little rubbery. Due to the thickness, it was a little harder to remove the excess at my tips and along the sides but also meant they were a little easier to handle when putting them in place because they weren't as floppy as some of the thin strips made from nail polish can be. I wasn't sure which way these were supposed to go on: with the bare peach section at the base of the nail like a straight half moon? or was that part a sort of handle to grab the strip by when applying? I held the strips up to my nails and saw the dots would cover them if I used the plain part as a handle instead of putting by the base of my nail, so I went with that. I was impressed with how shiny the silver dots were; the overall effect was classy bling.


The curve at the end of the strips was too square to be a good match for the curve at the base of my nails, so there are some oddly shaped gaps here in my first go round with these.


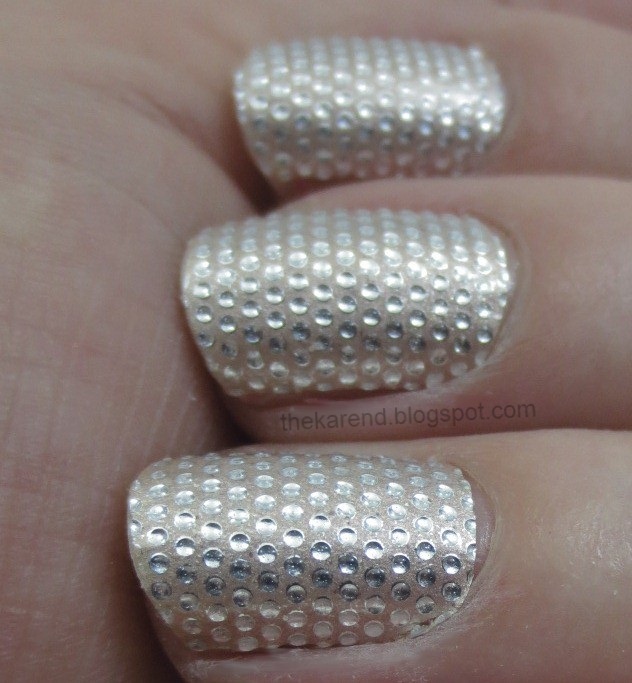
I was sad when the dots started to wear off at the tips of my nails. Here's how they looked on day 3:
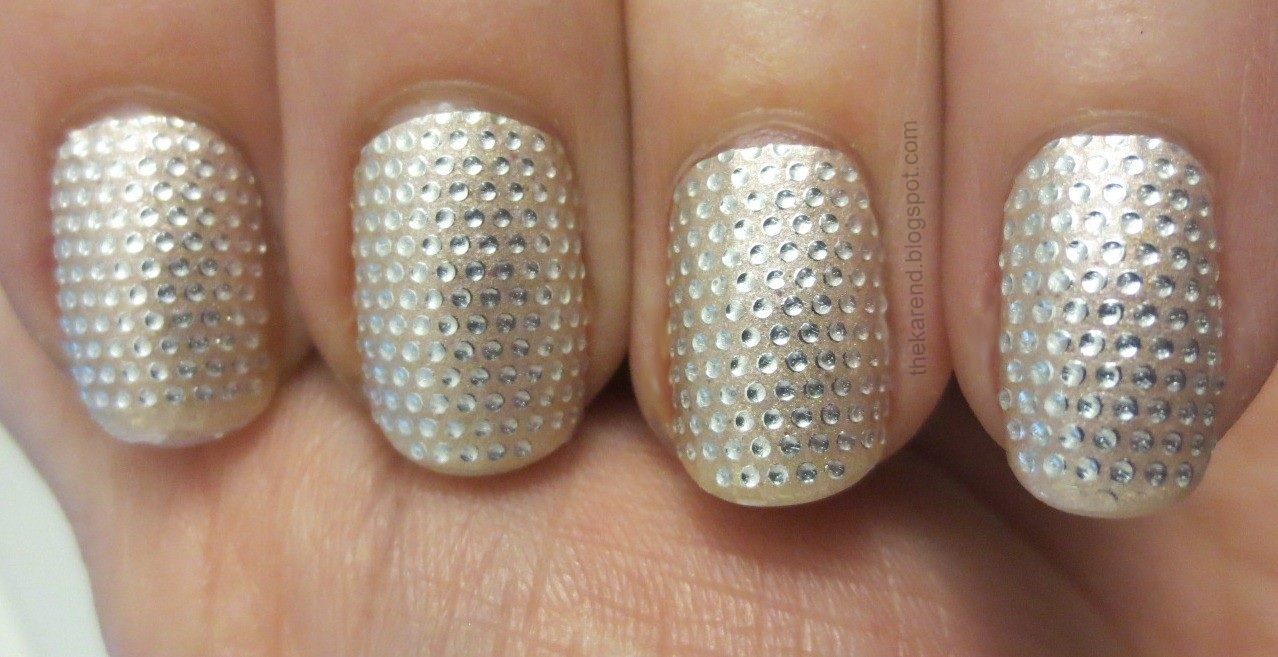


Here's day 4:


I got a wrinkle in the sticker on my right thumb when I applied them and couldn't smooth it down (the thickness of the strip conspired against me here). Along the high spot of that wrinkle, the dots not only disappeared but the strip wore through (it probably didn't help that the wrinkle felt weird so I kept poking at it).


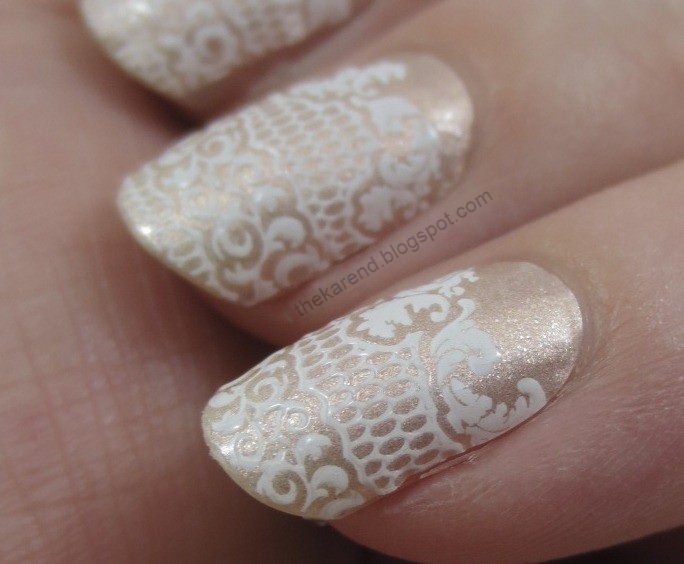
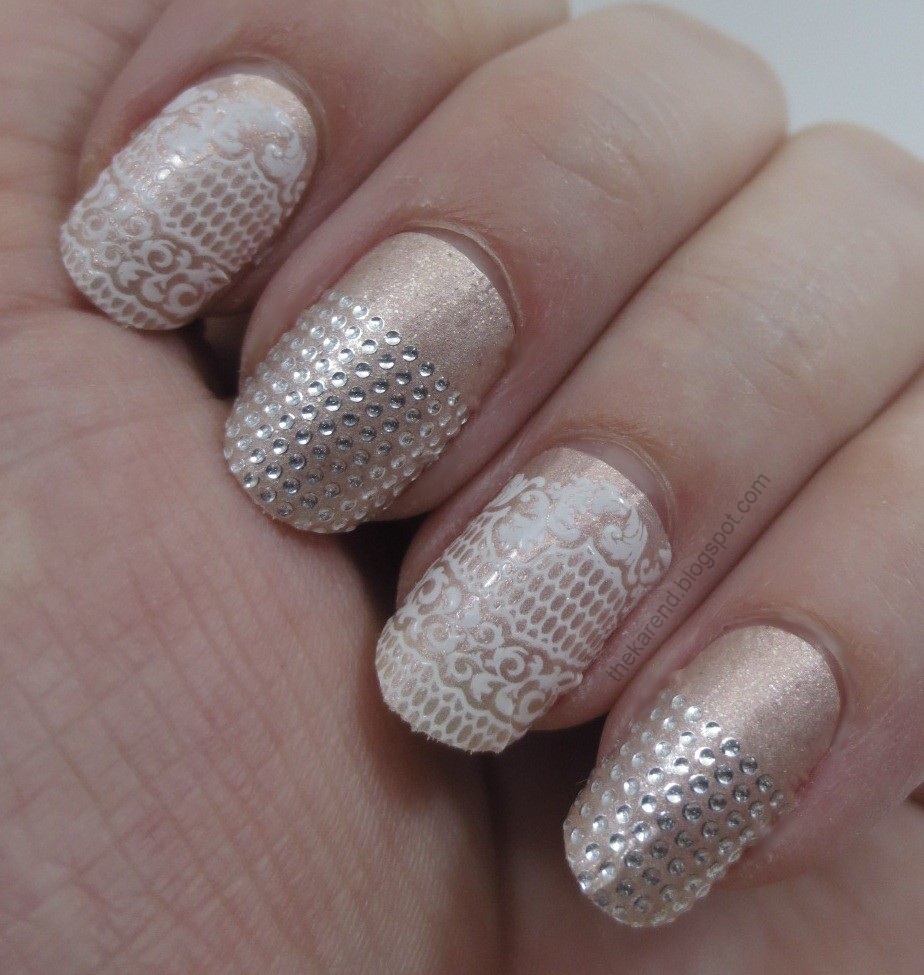
The next time I tried Sleek Sticks, a couple weeks later, I chose Embrace the Lace, which has a textured white lace design on a shimmery peach background.


I got these to fit my nails better at the base; they had a plain background on both ends of the strip, so I think that helped since it was easier to stretch that part, and I also did a bit of trimming to make them rounder. I was happy I didn't end up making weird and lopsided shapes, then having to trim more, then ending up with a sticker entirely too short for my nail.


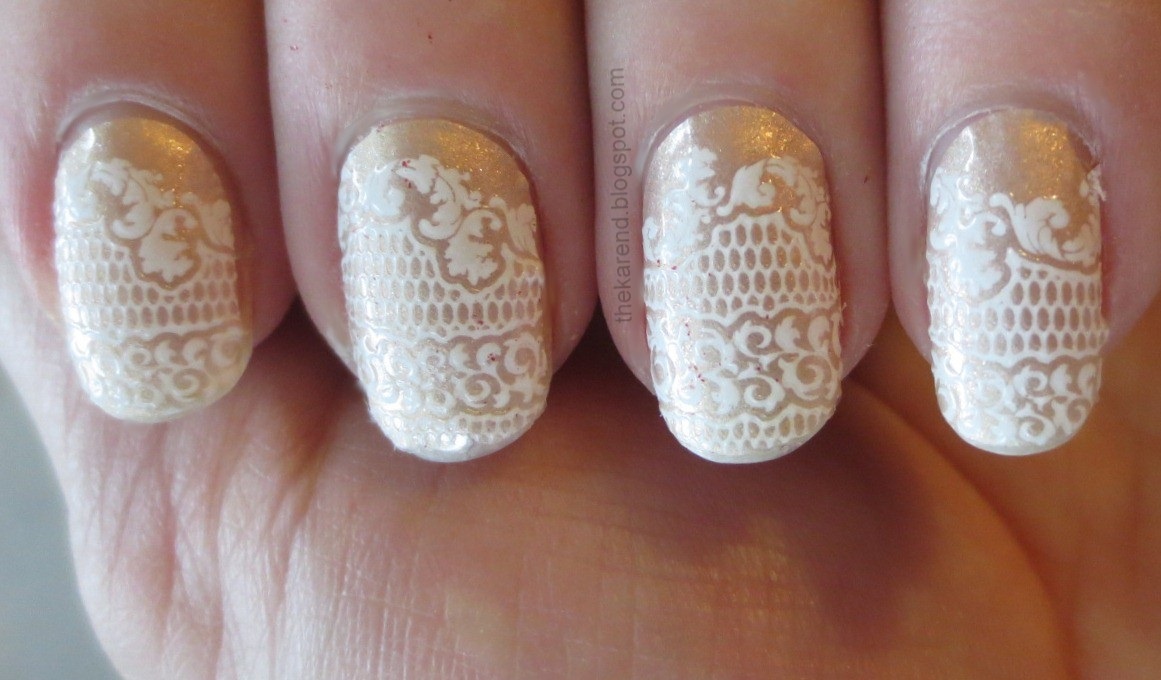
Here's the wear on day 4 (I'm not sure what the red dust is on some of my nails or why I didn't notice it when I was taking photos):


Because these are stickers, not nail polish, they peel right off and don't need remover. I wore them over a treatment base to protect my nails, but I didn't notice any instances of that base peeling off with the sticker. If anything, they left a slight adhesive residue on the nail, which is far better than pulling up parts of the nail with the sticker.


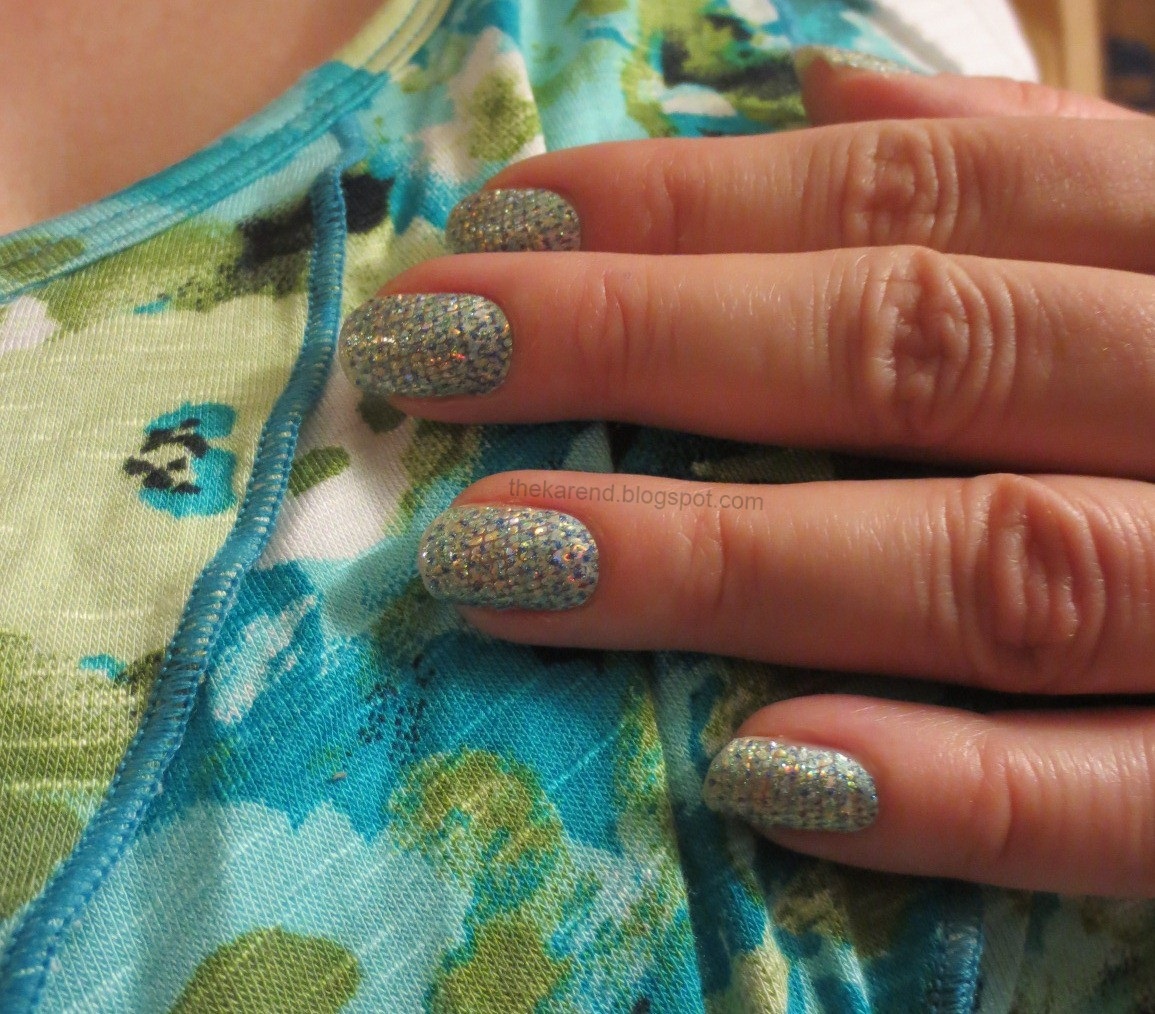
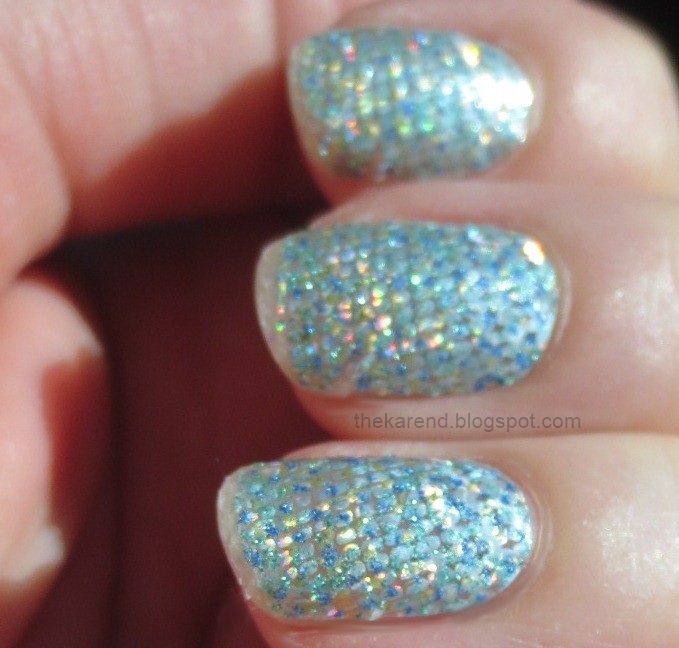
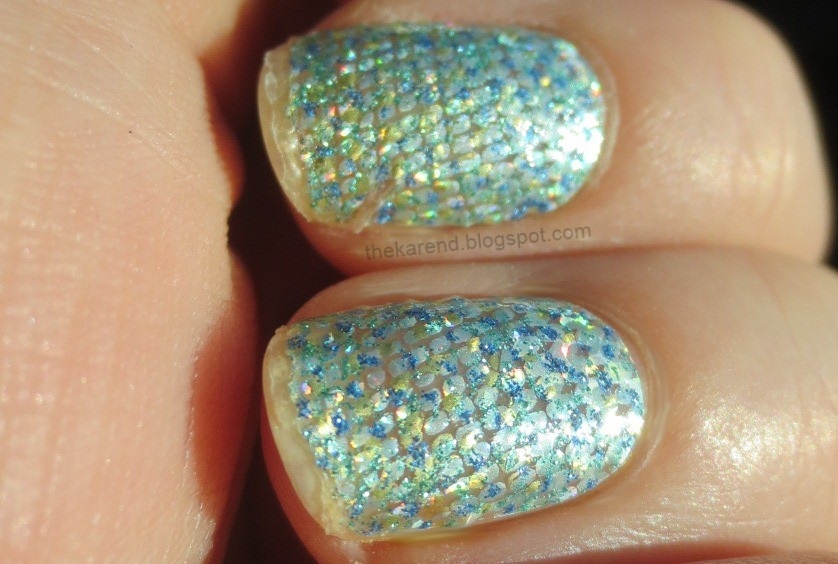
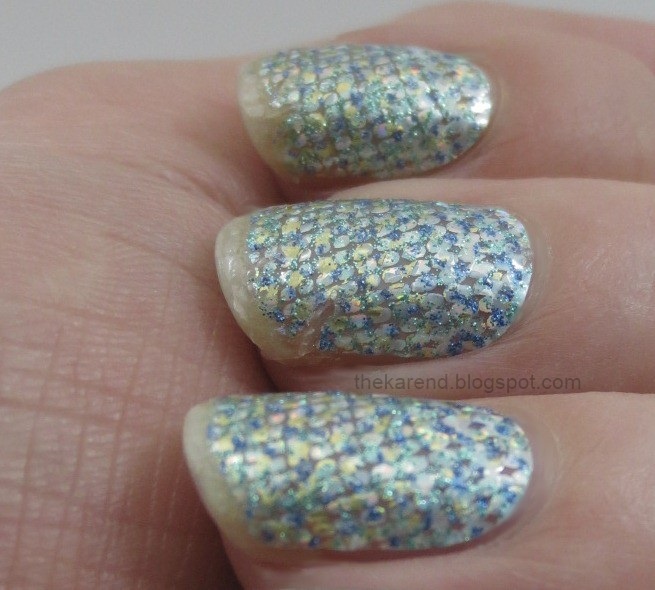
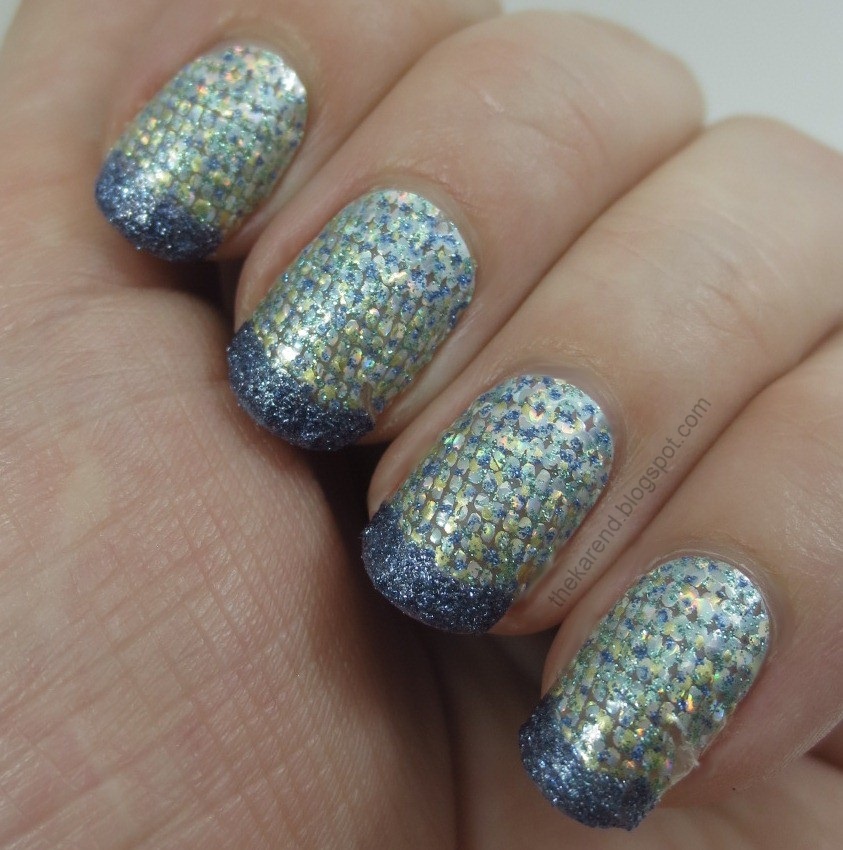
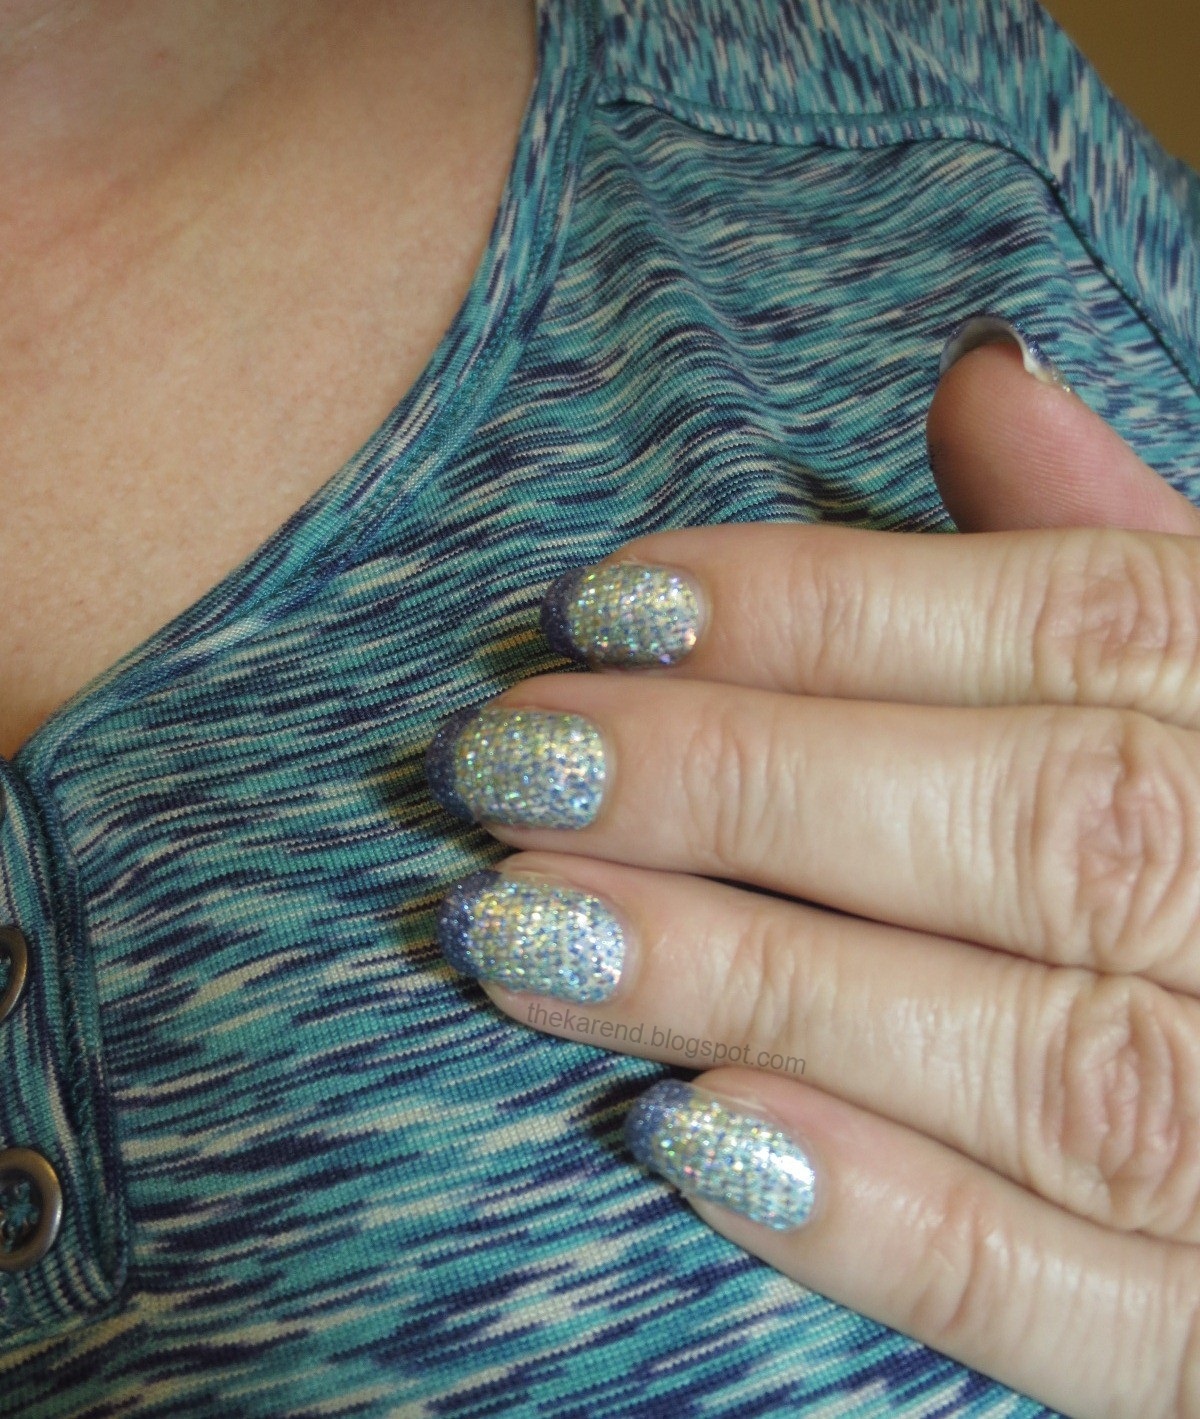
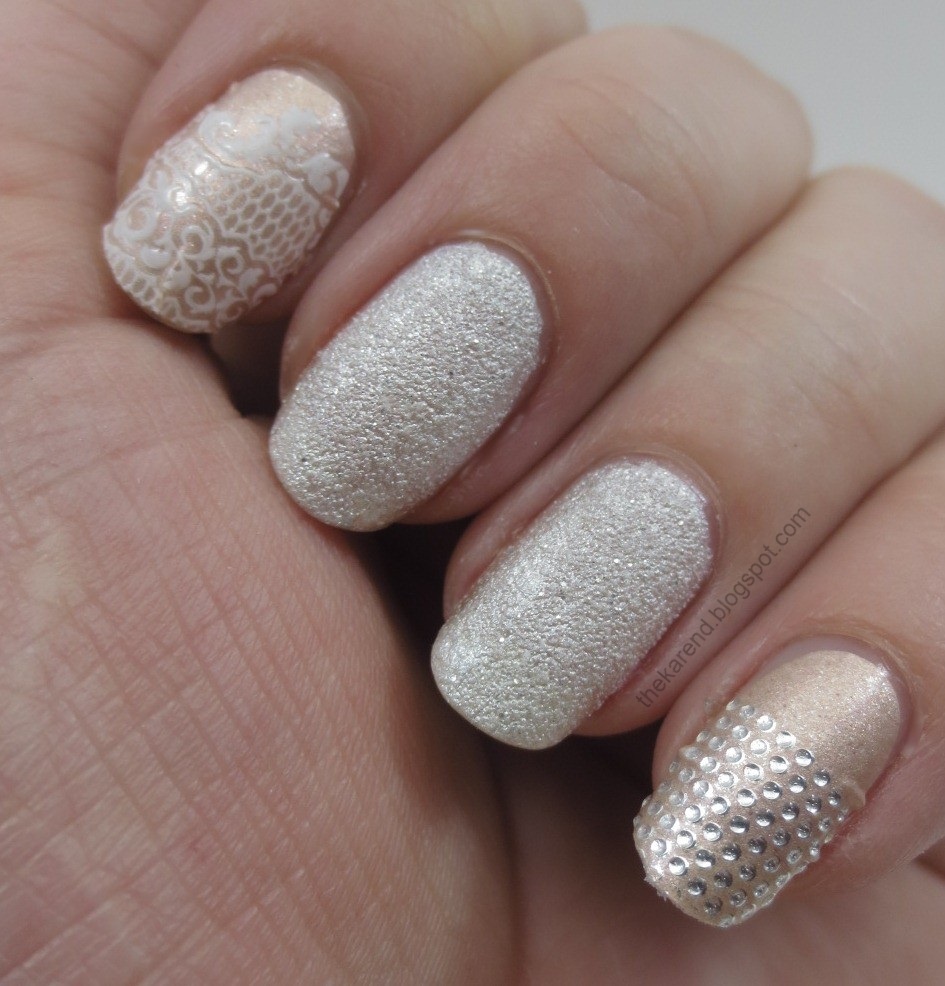
Also because they are sticker and not nail polish, they don't dry out. A couple weeks after I wore Embrace the Lace (so at least a month after I wore Glam It On), I combined the leftovers from both of my first two Sleek Sticks experiences into one look that alternated the two designs. I put the Glam It On ones the other way round this time.


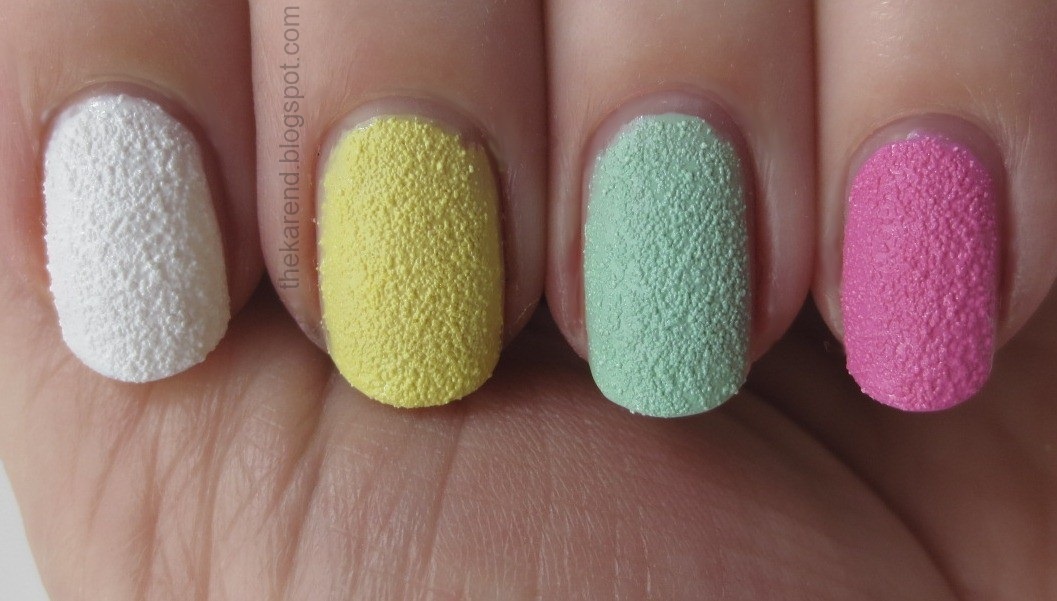
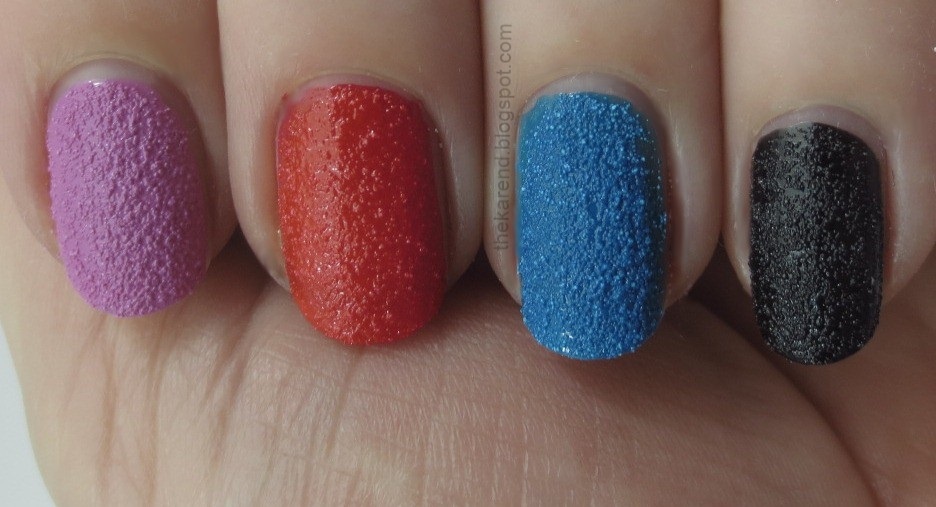
I peeled off the left hand to do some swatching and was was surprised that the stickers on my right hand held up quite well through holding remover saturated cotton pads as I changed colors on my left hand multiple times. When it was time to go out the next day, I used the last of the Sleek Sticks to redo my left hand (filling in with OPI Liquid Sand Solitaire when I ran out).


Actually the place I went out to wearing this frankenmani was the lunch I mentioned in my last entry. Talking about our nails, Tracey mentioned that she'd tried using topcoat on these Essie strips and it did not go well, so there goes my idea for getting them to wear longer.

I think these stickers will be nice as a change of pace when I want something easy that I know I won't need to wear for a full week (for that I'll use actual nail polish strips). The texture on them can be a bit distracting, in that I'm tempted to rub my fingertips over them, similar to when I wear textured polish. I am easily distracted, though. Since they don't dry out, they'll make good accent nails, too.

Tuesday, July 23, 2013

Not Nails


Over the weekend, I was catching up on organizing photos on my laptop and realized I had completely failed to take any nail photos at all (or face photos, for that matter) when I met up the weekend before with The Holo Queen and traceyloveslacquer. Oops. I did take this shot of some brightly colored shirtless (and headless) male mannequins on my way out of the mall after we'd had lunch and shopped.


Perhaps I can distract you from the lack of nail photos with this sunrise I captured at the gas station the other morning as I waiting for my tank to fill up:


And here's my newest sock monkey, a pocket size that Mr. Karen bought for me when he was off on his guys' trip a few weeks back. I've since decided that this pocket in my purse is not a good home for him, as he fell out into the parking lot when I was getting out of my car once. (I have also since cut off his hangtag, but I don't think that will help him not tumble out as it wasn't that heavy.)


I'll be back next time with photos of my nails, since right now I need to do some catching up with work stuff. What are you catching up with in your life? Or are you super organized and on top of things (and if so, can you tell me how you manage that)?


Monday, July 22, 2013

Nicole by OPI Neons

One of the things I shared in last week's display post was the Nicole by OPI Neons display, which has two sets of mini polishes (and full size bottles of Top Coat Plus). I was fortunate to receive both sets of minis for review.

Let's start with the Notorious Neons set, which has the White Base with Green Neon, Fuchsia Neon, and Orange Neon.


Here's the back of the box, with directions and ingredients:


The white base wasn't as self-leveling as I would have liked, but it was fairly opaque, which I suppose is its main job. I did find two coats was necessary to get it even enough for my liking.


I did Skittles swatches of these because the bottles are so tiny (3.75 ml), and I didn't want to use them up too much when I wasn't going to be wearing them very long. Left to right below (all over white): Fuchsia Neon, Orange Neon, Green Neon. These are without topcoat, and you can see the typical satin finish most neons have.


The one called Fuchsia is does not resemble any idea of the color fuchsia I've ever had. It's clearly an orange red, nothing to do with purpley pink at all (well, other than it's got red in it). I would have called it Coral Neon or Tomato Neon (as they seemed to want to stick with one word colors to go with the neon part of the name). I found the green a bit streaky; I really should have added another coat to even it out. (All of the colors here are three coats over the two coats of white.)

Here they are with topcoat on them:


The second set is Scandalous Neons, which has the same White Base along with Blue Neon, Purple Neon, and Pink Neon.


For the sake of completeness, here's the back of this box (the ingredients are slightly different than the first set due to the colorants):


Left to right below: Pink Neon (alone), Pink Neon (over white), Purple Neon (over white), Blue Neon (over white). None of these are particularly neon to my eyes, though the white base does brighten them up (and I like the Purple Neon very much just for the color). Pink and Blue are three coats of color; Purple is two.


As mentioned in my display post, I saw these at Meijer, but my understanding from the press release is they should also be showing up at CVS, Duane Reade, HEB, Kroger, and ShopKo in the U.S. ($10 per set) and Loblaw, Jean Coutu, Rexall, London Drugs, and Shoppers Drug Mart in Canada ($12.50 per set). I don't see anything about these sets on the Nicole by OPI website but they have popped up on the NOPI Facebook page.


The polishes shown in this entry were provided free for review purposes. The content of the entry was not dictated by the provider.